
Install
- Click Download free ZIP on the product page.
- In WordPress, go to Plugins → Add New Plugin → Upload Plugin, choose
email-log-tagger-1.0.1.zip, click Install Now, then Activate.
Logging starts immediately. Emails sent before activation aren't recorded.
Read the log
Go to Tools → Email Log Tagger.
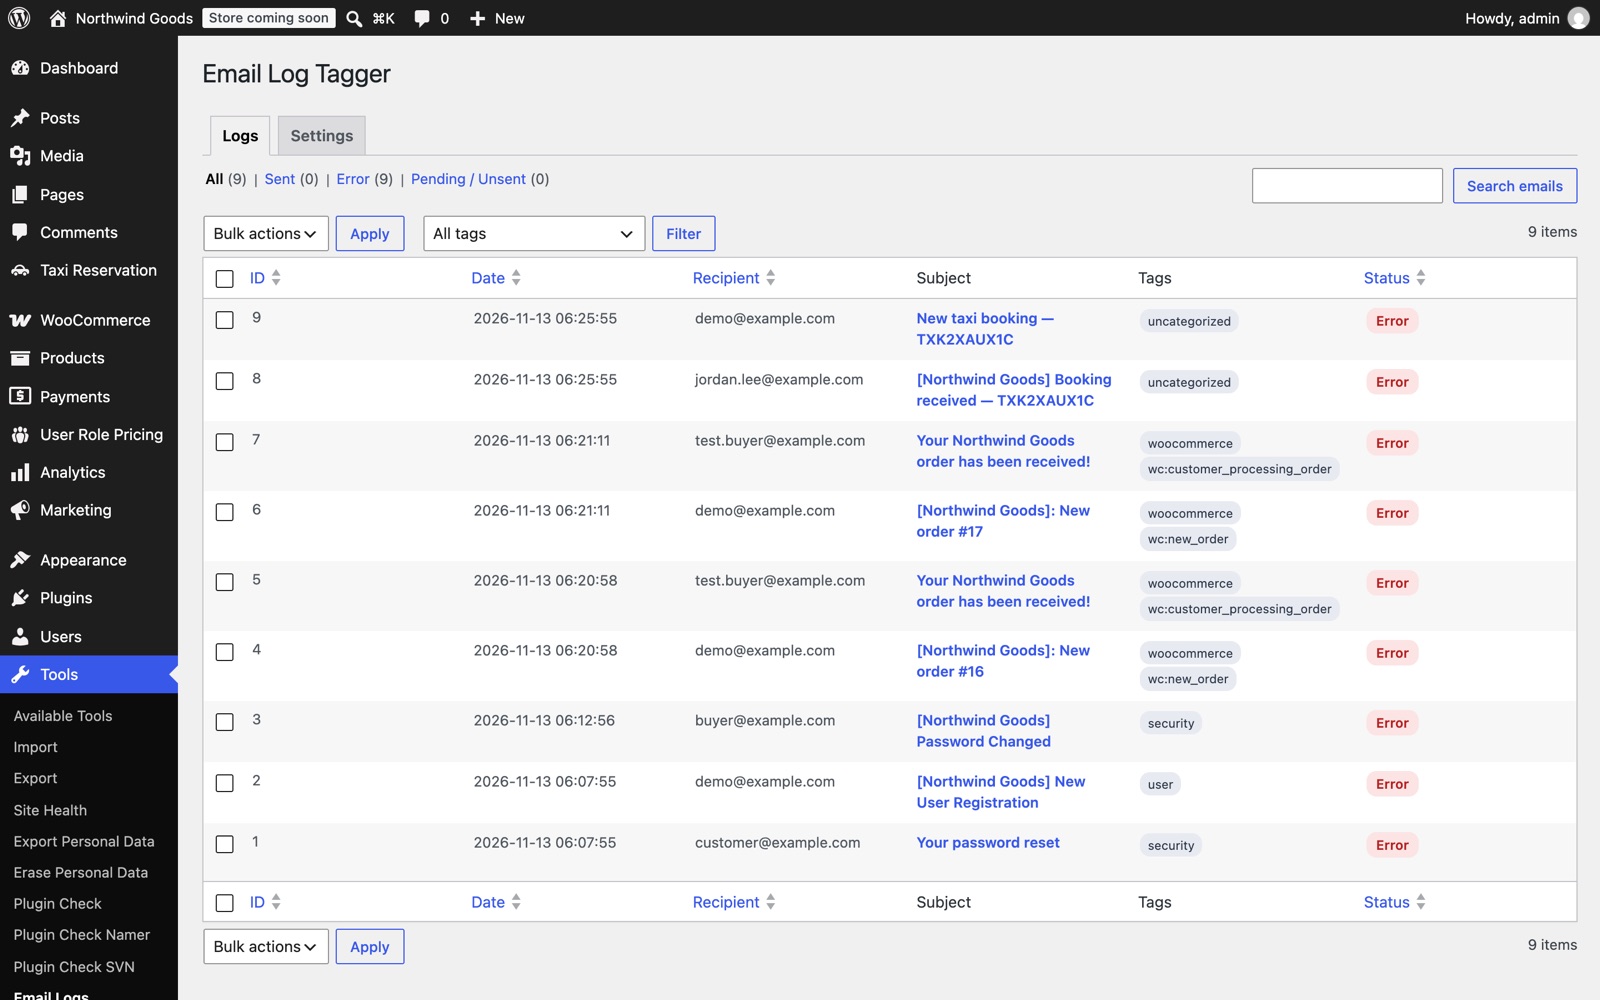
- Filter by status (sent, error, pending) or by tag, or search by recipient, subject or tag.
- Click a subject to see its recipient, tags, source, times, headers and body.
- Select rows to delete them, or clear the whole log.
What the status means
| Status | Meaning |
|---|---|
| Sent | WordPress handed the email to the mail server successfully. |
| Error | Sending failed. The error column shows the reason from the mail server. |
| Pending | The email was captured but WordPress never reported success or failure. Some SMTP plugins send in their own way; check their log too. |
"Sent" means your server accepted the email. Whether it reaches the inbox depends on the mail service, spam filters and your domain's SPF and DKIM records.
Tags
Tags are added from the email's source and content: woocommerce and the WooCommerce email type (such as wc:new_order), security, password, user, comment, core, privacy, or uncategorized. Use them to find, for example, every failed WooCommerce email.
Settings
Under Tools → Email Log Tagger → Settings:
| Setting | What it does |
|---|---|
| Retention (days) | Logs older than this are deleted every day. 0 keeps everything. |
| Log email body | Turn off to store only recipients, subjects and status, not message contents. |
Privacy
Logs can contain personal data and, for password-reset emails, reset links. Only administrators can see them. Keep retention short, consider turning off body logging, and mention email logging in your privacy policy.
Uninstall
Deleting the plugin removes its log table and settings.
Changelog
1.0.1
- Escapes every value at output on the email details screen.
- Tested with WordPress 7.1 and WooCommerce 11.3.