
This guide takes you from purchase to a working assistant in about ten minutes, then covers every setting. If you get stuck, contact support with your order number.
Requirements
- WordPress 5.0 or newer. Tested with WordPress 7.1.
- PHP 8.2 or newer, with the OpenSSL extension (standard on almost every host).
- Your site must be able to make outgoing HTTPS requests to your AI provider and to
www.webxdevelopments.comfor license checks and updates. - An account with one AI provider: OpenAI, Anthropic, Google AI Studio, AWS (Bedrock), Mistral, Groq, DeepSeek, or any OpenAI-compatible API.
Install the plugin
- After checkout, open Account → Downloads on this site and download
ai-chatbot-2.1.0.zip. Don't unzip it. - In WordPress, go to Plugins → Add New Plugin → Upload Plugin.
- Choose the ZIP file, click Install Now, then Activate.
A new AI Chatbot menu appears in your WordPress admin.
Activate your license
- On this site, open Account → Licenses and click Show license key. Copy the key; it starts with
wx_. - In WordPress, go to AI Chatbot → License & Updates.
- Paste the key and click Activate / replace key. The status changes to Active.
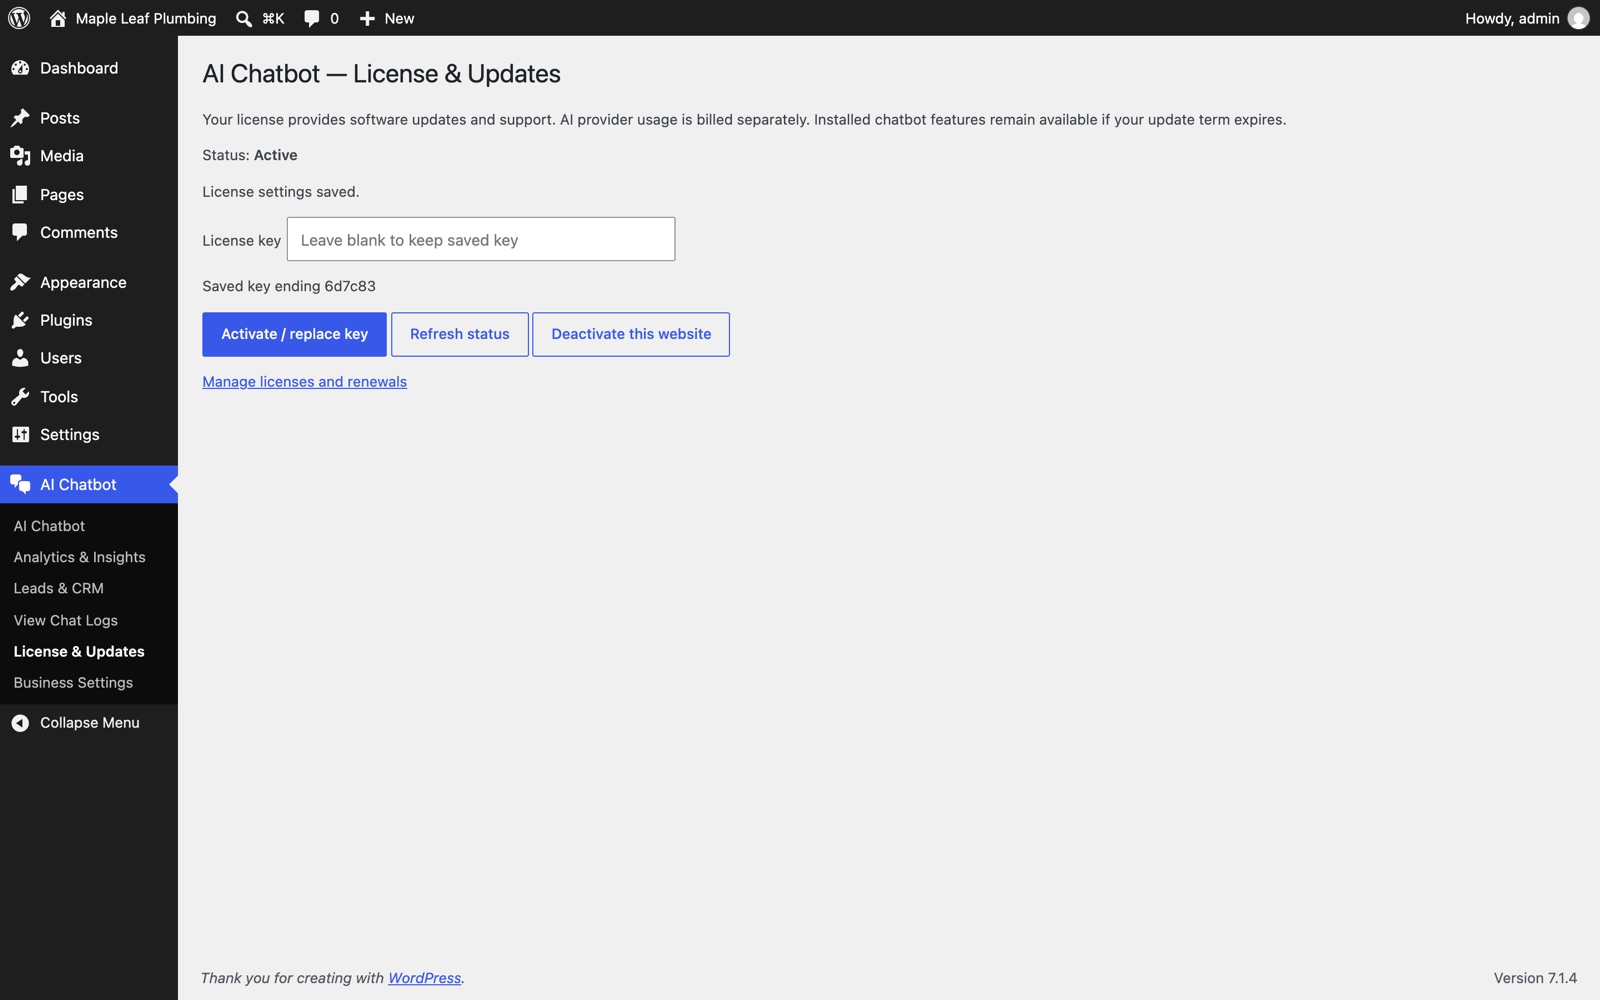
Each website domain uses one activation from your plan. www.example.com and example.com count as the same domain. The plugin re-checks the license once a day in the background; low-traffic sites should run WordPress cron from a real server cron job so the check happens on time.
Move a license to another website
- If the old site is still online, go to AI Chatbot → License & Updates there and click Deactivate this website.
- If the old site is gone, open Account → Licenses on this site and click Deactivate next to that website.
Then activate the key on the new site.
When a license expires
The chatbot keeps working with all your settings and data. Updates, new activations and support stop until you renew in Account → Licenses.
Connect your AI provider
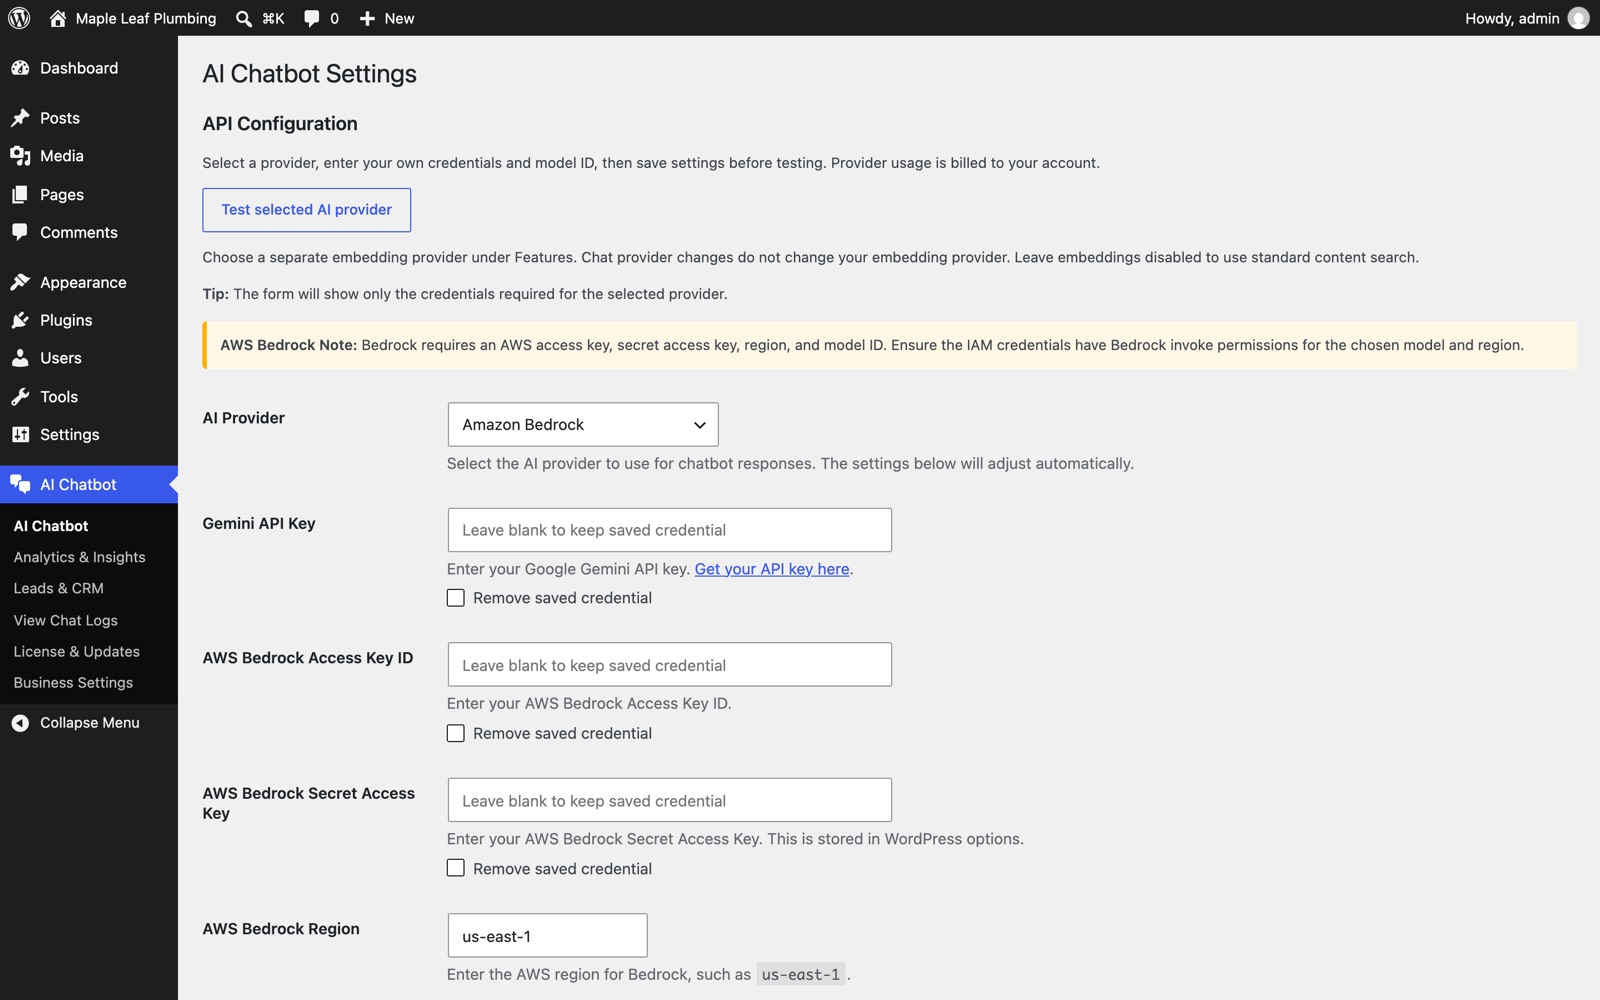
Go to AI Chatbot → Settings, choose your AI Provider, fill in only the fields shown for it, and click Save Settings. Then click Test selected AI provider to confirm it works.
| Provider | Where to get credentials | Example model |
|---|---|---|
| OpenAI | platform.openai.com → API keys | gpt-4.1-mini (default) |
| Anthropic Claude | console.anthropic.com → API keys | claude-haiku-4-5 |
| Google Gemini | aistudio.google.com → Get API key | gemini-2.5-flash (default) |
| Amazon Bedrock | AWS IAM access keys, see below | global.anthropic.claude-haiku-4-5-20251001-v1:0 |
| Mistral | console.mistral.ai → API keys | mistral-small-latest (default) |
| Groq | console.groq.com → API keys | any Groq chat model |
| DeepSeek | platform.deepseek.com → API keys | deepseek-chat |
| OpenAI-compatible | your provider's dashboard | the model name it gives you |
Smaller, faster models answer website questions well and cost far less. AI usage is billed by your provider, not by us.
Your keys are saved in your WordPress database and are only ever sent from your server to the provider. Leave a key field blank to keep the saved key; tick Remove saved credential to delete it.
Amazon Bedrock setup
- In the AWS console, open Amazon Bedrock → Model access in your region and enable the model you want, for example Claude Haiku 4.5.
- Create an IAM user for the website with this policy, then create an access key for it:
{
  "Version": "2012-10-17",
  "Statement": [
    {
      "Effect": "Allow",
      "Action": ["bedrock:InvokeModel"],
      "Resource": [
        "arn:aws:bedrock:*:*:foundation-model/*",
        "arn:aws:bedrock:*:*:inference-profile/*"
      ]
    }
  ]
}
- In WordPress, enter the Access Key ID, Secret Access Key, Region (for example
us-east-1) and Model ID. Model IDs that start withglobal.orus.are inference profiles; they need theinference-profileline in the policy.
If the chat replies "AI service request failed", the key usually lacks permission for that model or region. Check Model access and the policy.
Show the chatbot on your site
Floating button on every page
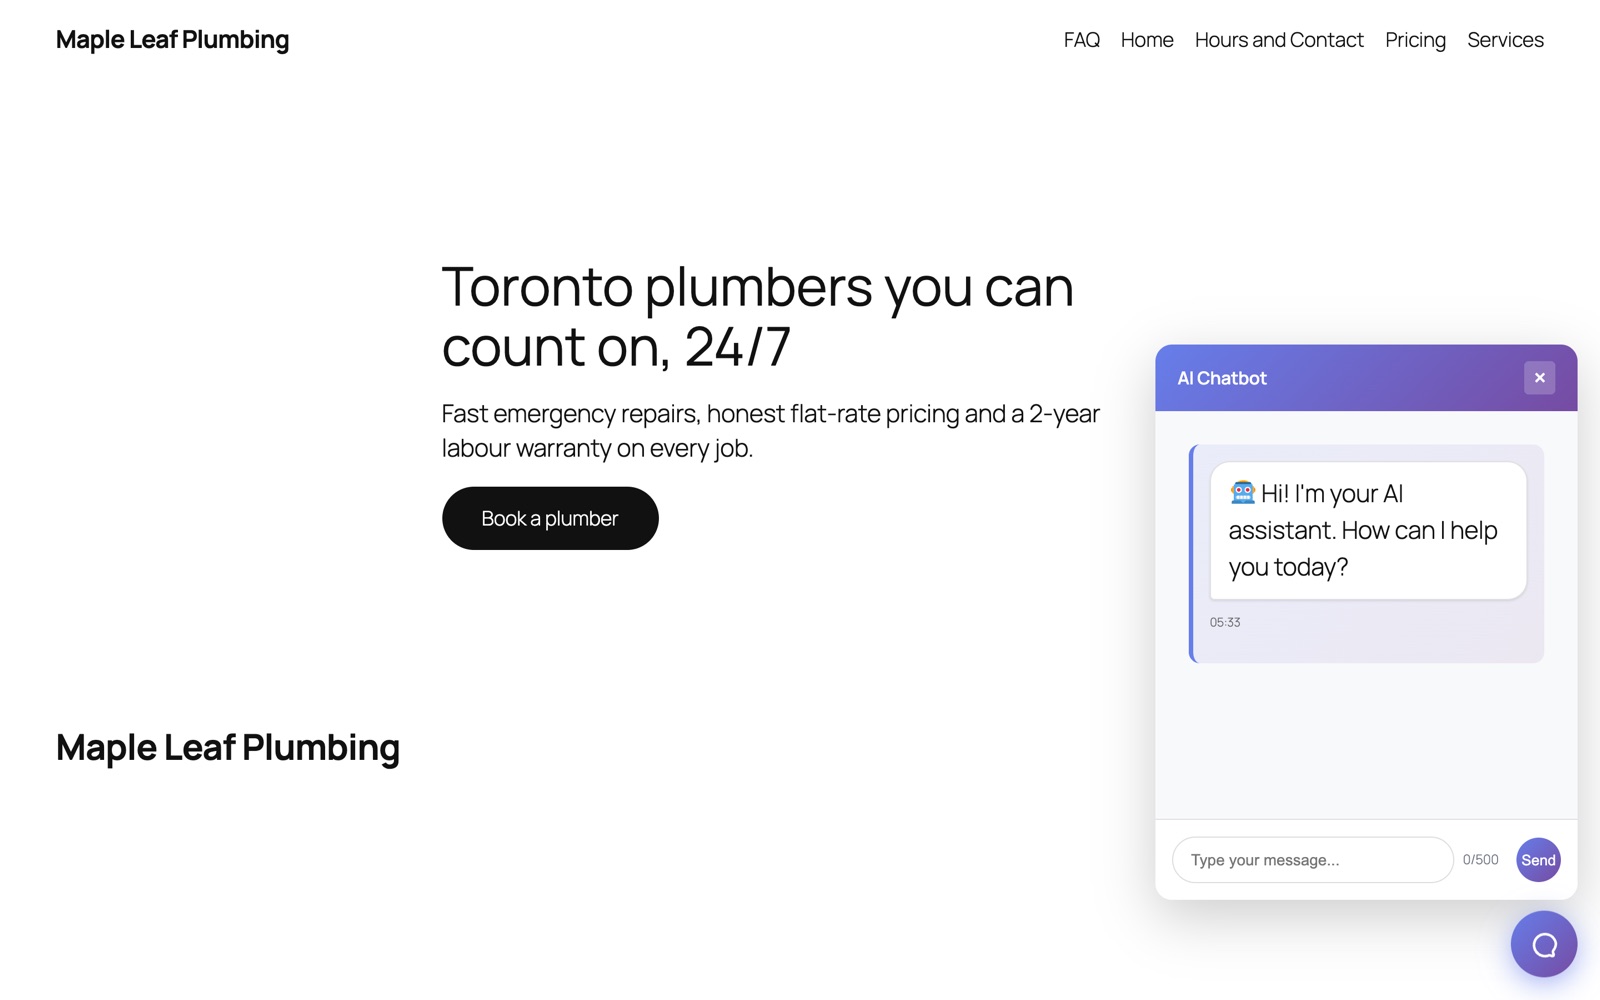
In AI Chatbot → Settings, turn on Enable Floating Chat Box and save. A chat button appears in the bottom-right corner of every page.
Inside a page
Add this shortcode to any page or post:
[ai_chatbot]
Options:
| Option | Default | Example |
|---|---|---|
title | AI Assistant | title="Ask Maple Leaf" |
height | 400px | height="520px" |
width | 100% | width="600px" |
placeholder | Type your message here... | placeholder="Ask about pricing" |
theme | default | theme="dark" |
Example: [ai_chatbot title="Ask us anything" height="520px" theme="dark"]
Answer from your website content
In AI Chatbot → Settings → Features:
- Enable WordPress Context: the assistant searches your published content and answers from it. Turn this on.
- Supported Post Types: choose which content it may read, for example Pages and Posts. Private and draft content is never used.
- Include URLs in Responses: answers include links to the matching pages.
- Enable Chat Sessions: a visitor's conversation continues as they move between pages.
Page-builder shortcodes and markup (Elementor, Divi, WPBakery, Beaver Builder) are removed before the text is sent to the AI.
Semantic search (optional)
Turn on Enable Vector Embeddings and choose an Embedding Provider: Google Gemini or Amazon Bedrock (Titan, amazon.titan-embed-text-v2:0). The plugin builds a search index of your content, so a question like "do you fix leaky taps?" finds your "faucet repair" page. The embedding provider can differ from your chat provider.
Business settings
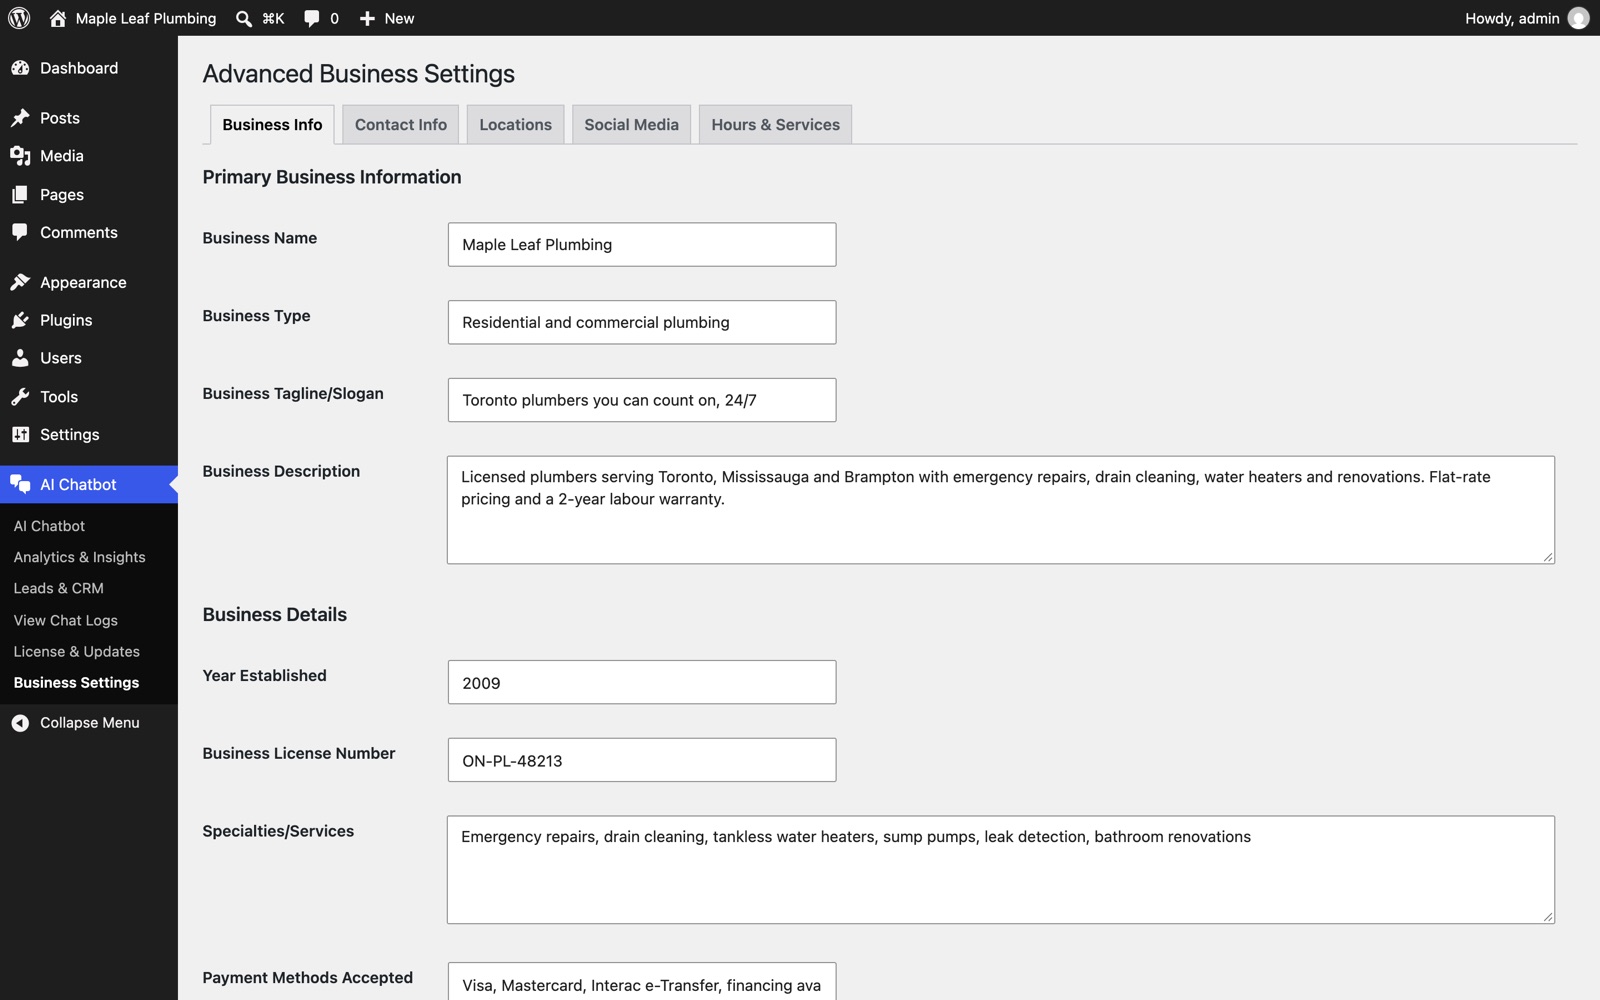
Under AI Chatbot → Business Settings, fill in the tabs: Business Info, Contact Info, Locations, Social Media, and Hours & Services. The assistant uses these details to answer questions about opening hours, phone numbers, addresses and services accurately, even when they aren't written on a page.
Leads and CRM
When a visitor wants a quote or a callback, the assistant collects their name, email and phone number. Leads appear under AI Chatbot → Leads & CRM, where you can filter them and set a status: New, Contacted, Qualified, Converted or Lost.
Chat logs and analytics
- AI Chatbot → View Chat Logs lists conversations when Enable Conversation Logging is on.
- AI Chatbot → Analytics & Insights shows conversations, engagement, the most common and failed questions, and visitor feedback over a date range you choose, with data export.
Updates
When a new version is released, WordPress shows it under Dashboard → Updates and on the Plugins page, like any other plugin. Click Update now. Updates need an active license; the download link is created at the moment you update and expires after 60 seconds.
You can also download the latest version from Account → Downloads and upload it over the old one.
Privacy
Visitors' questions, and the page text that matches them, are sent to the AI provider you chose. Chat logs and leads are stored in your own WordPress database. The license check sends only your license key, your site's domain, a random installation ID and the plugin version, never visitor data. Mention the chatbot and your AI provider in your privacy policy.
Troubleshooting
The chat says "AI service request failed". The provider rejected the request. Check the API key, that the model name exists for your account, your provider's billing or quota, and for Bedrock, model access and IAM permission. Click Test selected AI provider in Settings to check again.
License status is not Active. Make sure the key starts with wx_ and was copied completely. If you see "Activation limit reached", deactivate an old website (see "Move a license"). Your server must reach https://www.webxdevelopments.com; some firewalls block outgoing requests.
The chat button doesn't appear. Turn on Enable Floating Chat Box in Settings, then clear your caching plugin and CDN cache.
Answers ignore my content. Turn on Enable WordPress Context, select the right Supported Post Types, and make sure the pages are published.
No update is offered. Updates need an active license. Go to License & Updates and click Refresh status.
Uninstall
Deactivating the plugin stops the chat and the daily license check, and keeps everything. Deleting it from Plugins removes its settings, chat logs and search index. Leads are kept in the database. To free the license slot, click Deactivate this website before deleting, or remove the site in Account → Licenses.
Changelog
2.1.0
- Eight AI providers: OpenAI, Claude, Gemini, Amazon Bedrock, Mistral, Groq, DeepSeek and OpenAI-compatible APIs.
- License activation and one-click updates through your WebX account.
- Mobile chat window layout fixed.
- Security hardening for chat, lead and admin requests.
Support
Email support is included while your license is active. Contact us with your order number, your WordPress and PHP versions, and what you see on screen.